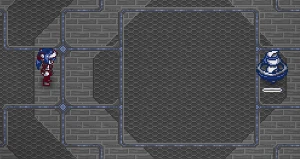
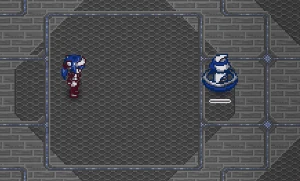
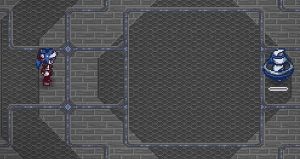
There are six Wave Throw Combat Arts available to Spheromancers: two first-level, two second-level, and two third-level arts. You can have only one of each level active at a time.
Fae Round[ | ]
| LVL 1 | CP 1 | SP 1 | DMG Ranged | Wave Throw |
Shoots a super fast projectile penetrating a line of enemies.
Lea shoots a very fast projectile which pierces through, damages, and knocks back all enemies in a line.
While similar to Ball of Steel in that it's a fast projectile which pierces through enemies damaging them all, Fae Round does not bounce off terrain to hit more times, in exchange for much higher damage on its one hit. That way you can snap this off whenever you have a line set up without needing to consider terrain and angles for maximum effect. Fae Round and Ball of Steel are the only two arts affected by Bulk Calibre.
Essence Drain[ | ]
| LVL 1 | CP 1 | SP 1 | DMG Ranged | Wave Throw |
Hit enemies with a swarm of projectiles absorbing its HP.
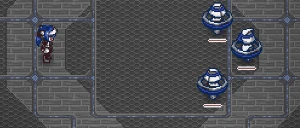
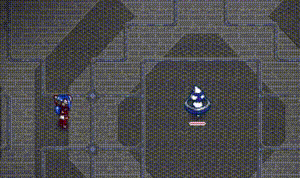
Lea shoots out a swarm of 12 balls that home in on a hostile target within a cone-shaped area. Upon impact, each ball pulls the enemy they hit closer to Lea and sends back a tiny ball that heals when it reaches her for half the damage dealt.
While it doesn't deal tremendous damage, Essence Drain can be indispensable if you need to heal but cannot spare time for healing items. Since it damages first and heals second, you can combine this with Berserker to boost the damage and healing, along with Mark. The balls slow down as they move away from Lea, eventually stopping completely a little further than Burn!. The enemies drawn in will be in a good position to follow up with a Melee Art like Ki Thrust, or you can counteract the pull with Guarding Gale.
Elven Orb[ | ]
| LVL 2 | CP 2 | SP 3 | DMG Ranged | Wave Throw |
Shoots a super fast projectile that bounces between the player and a wall for several times and penetrates everything in between.
Lea shoots a projectile similar to Fae Round that returns to her after reaching a wall, then shoots a second projectile that returns in similar manner. The first shot follows the direction set when initiating Elven Orb, but the second shot follows adjustments to your aim and homes in on the closest target to that. The return shots track your position, and if you have a decoy(s) active from Warp Decoy, Toxic Revenant, or Gungnir, both shots return to that instead, so that the second shot originates from the decoy.
While its basic use is very similar to Fae Round, Elven Orb displaces enemies quite a bit less than multiple Fae Rounds since the return shots push them toward you. It behaves very similar to Ball of Boomerang this way, but deals much more damage within a much narrower width. Play with your movement, aim, and decoys to spread it over a wider area or trick shot around corners.
Vital Pulse[ | ]
| LVL 2 | CP 2 | SP 3 | DMG Mixed | EFFECTS |
Wave Throw |
Hit an enemy with a swarm of projectiles, absorbing its HP before blasting it away with a final attack.
Lea shoots out a swarm of 24 balls that home in on a hostile target within a cone-shaped area and pull enemies they hit closer, followed by a blast similar to Ki Thrust knocking enemies away, but doesn't inflict Mark. Lea heals for half of all damage dealt.
While essentially 2 Essence Drains followed by a Ki Thrust, Vital Pulse does it all in one action, and its balls have more range than Essence Drain. Because the final blow heals from each enemy damaged, gathering multiple enemies in front of Lea will deliver much more healing. Due to the mixed ranged and melee damage, effects like Mark and passive modifiers affect this art's utility. Berserker is less effective because Lea starts healing before the attack finishes.
Ether Snipe[ | ]
| LVL 3 | CP 3 | SP 6 | DMG Ranged | EFFECTS |
Wave Throw |
Charge up a sniping attack that can bounce 3 times until it hits an enemy. Each bounce increases the strength of the attack.
Everything slows to a glacial pace and an aiming line appears on the screen showing the full path of the projectile. After 3 seconds, Lea fires a ball reminiscent of Fae Round that bounces off walls up to 3 times. The ball locks the first enemy it hits, then after a delay, deals numerous heavy blows ending with a final wallop. If you fail to hit something by the end of the 3rd bounce, the ball fizzles out and nothing happens. Each bounce the ball makes before hitting a target increases the delay and number of blows.
With ideal execution, Ether Snipe deals far more damage to a single enemy than any other combat art. However, in complicated environments like Gaia's Garden, finding a trajectory within 3 seconds that will bounce 3 times before hitting your target is nearly impossible. Some locations don't even have walls. Added to that, hitting any destroyable object consumes the shot. You don't want to miss this shot, thus a direct hit or single bounce is preferred in most situations, that still rivals the damage output of other narrowly-targeted arts. The bounces add differing numbers of blows: ~11 for a direct hit, ~16 for one bounce, ~18 for two bounces, and ~21 for the full package. Plan out your timing, location, and modifiers, to enjoy some dazzlingly glorious snipes.
Wave Motion Beam[ | ]
| LVL 3 | CP 3 | SP 6 | DMG Ranged | EFFECTS |
Wave Throw |
Siphon HP from the enemies and trade it for a huge controllable wave beam that drains your HP.
Lea tosses out a vortex in front of her that damages and pulls all enemies in a wide circle around it towards its center, hitting 14-15 times and healing Lea for ~30% of the damage dealt. Thereafter Lea winds up and time slows down, while she unleashes a giant aimable piercing beam for a few seconds that consumes her health. The beam stops early if her health falls below 10%. The beam's duration and maximum number of hits increases by the ratio between her MaxHP and Attack stats, so that fluctuations between the two balance out to roughly equivalent total damage to enemies and herself.
An art with subtle moving parts. Basically, higher MaxHP for more but weaker hits, higher Attack for fewer but stronger hits, and both in sync for same number that hit harder. The initial damage and healing is quite minor; it mainly serves to guarantee you have enough health as ammo and a clump of targets. It also does not benefit from Mark, but the beam does. Berserker is finicky to use since you have to stay above 10% health.